In 2026, a tire inspection is more than a quick glance at the tread. It is a practical safety check of pressure, tread depth, sidewalls, wear patterns, and visible damage. The U.S. National Highway Traffic Safety Administration (NHTSA) reported 646 fatalities in tire-related crashes in 2022. That figure does not mean every crash resulted from poor maintenance. It does show why routine checks deserve attention.
A useful inspection starts with cold-tire pressure and a reliable gauge. It continues with tread-depth measurement, a search for cuts or bulges, and a look for uneven wear. The U.S. Tire Manufacturers Association recommends checking tire pressure monthly and before long trips. Small cracks matter. So does a slow leak that keeps returning. Tire Industry Association training expert Kevin Rohlwing emphasizes looking beyond tread depth to assess the tire’s overall condition. That broader view helps explain why visual checks, pressure checks, tread measurements, and professional internal inspections each serve a different purpose.
This guide compares the top tire inspection types for 2026, including hands-on checks and technology-assisted monitoring. It also explains when a shop inspection may be appropriate. No single method catches everything. A dashboard warning light can miss a damaged sidewall, while a quick visual check cannot confirm internal condition. That distinction is easy to overlook. The recommendations here draw on safety guidance and industry training, but individual tire makers may specify different limits.
What Are the Top Tire Inspection Types in 2026?
Tire Inspection: Purpose and Key Safety Principles
A tire inspection is a practical safety check, not just a search for worn tread. Tires connect a vehicle to the road, so small defects can affect braking, handling, and stability. Check them monthly and before long trips. A quick glance can fool anyone; I have missed a slow leak when I was in a hurry.
Use a pressure gauge when the tires are cold, and compare readings with the vehicle’s door placard or owner’s manual. Do not rely on the maximum pressure printed on the tire. Look across the tread for uneven wear, cracks, or objects lodged in the grooves. Check the sidewalls for cuts, bulges, and exposed cords. Look closely. If a foreign object is embedded, avoid pulling it out; seek a qualified tire professional.
Tread depth matters, but it is only one part of the check. Wear indicators can show when tread is nearing its replacement point, while uneven patterns may signal alignment, pressure, or suspension concerns. Inspect the spare too, if the vehicle has one. Small changes matter. A tire can look acceptable in a driveway and behave differently on a wet road, so uncertain damage deserves a closer assessment.

Tire Inspection: Purpose and Key Safety Principles
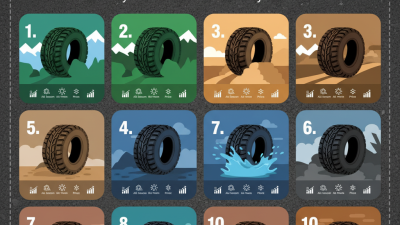
How to read the chart: These are tread-depth checkpoints, not a guarantee of safe performance. The 2/32-inch figure is a common U.S. legal minimum, though requirements can vary by jurisdiction. Greater tread depth may be advisable for wet or snowy conditions.
A complete tire inspection also checks cold pressure against the vehicle placard, sidewalls for cuts or bulges, and tread for uneven wear or embedded objects. Check tire pressure monthly and before long trips; have damage or unusual wear assessed by a qualified tire professional.
Reference: NHTSA Tire Safety. Wet- and snow-traction checkpoints are practical caution benchmarks, not universal legal limits.
In 2026, a useful tire inspection still starts with good light and a slow walk around the vehicle. Look across each tread, not just at the center. Check for shallow grooves, wear bars level with the tread, and uneven patterns such as one shoulder wearing faster than the other. A tread-depth gauge gives a more reliable reading than appearance alone. Inspect the inner edges too; they can be hard to see without turning the wheels. A quick glance can fool you.
Examine both sidewalls for bulges, deep cuts, cracks, or exposed reinforcement. Bulges matter. They may signal internal damage, even when the tread looks healthy. Look closely around the bead, where the tire meets the rim, and note any fresh scrapes or deformation. Check for nails, stones, or other objects lodged in the tread, but do not pull an embedded object out during a visual check. Mark its location and arrange a qualified assessment. If you spot exposed cords, a pronounced bulge, or a deep cut, avoid relying on appearance to judge safety. Record what you see, including the tire position and damage location. Sometimes the lighting is poor, or the view is blocked; recheck rather than guessing.
| Inspection Type | What to Check | Typical Condition | Warning Signs | Recommended Action |
|---|---|---|---|---|
| Tread depth | Inspect the main grooves across the tread and compare depth at several points around each tire. | Grooves remain clearly defined, with wear indicators not level with the tread surface. | Tread is flush with wear indicators, or depth is uneven across the tire. | Measure with a tread-depth gauge. In the United States, 2/32 inch is a common minimum replacement threshold; local requirements may differ. Replace tires that have reached the applicable limit. |
| Tread wear pattern | Look across the inner shoulder, center ribs, and outer shoulder for differences in wear. | Wear is reasonably even across the tread and between tires on the same axle. | One edge is more worn, the center or both shoulders are unusually worn, or patches appear cupped or scalloped. | Have tire pressure, wheel alignment, suspension, and balance checked as appropriate. Follow the vehicle manual for pressure and rotation guidance. |
| Sidewall condition | Inspect both visible sidewalls for cuts, cracks, abrasions, exposed cords, or deformation. | Sidewalls are free of significant damage and retain a consistent shape. | Bulges, deep cuts, exposed reinforcement, or severe cracking are present. | Do not drive on a tire with a bulge or exposed cords. Arrange prompt assessment by a qualified tire professional; replace the tire if it is unsafe or not repairable. |
| Embedded objects and punctures | Check the tread for nails, screws, glass, or other objects, and look for signs of air loss. | No embedded objects, visible punctures, or repeated pressure loss. | An object is lodged in the tire, a puncture is visible, or the tire repeatedly loses pressure. | Do not pull out an embedded object before assessment. Have the tire inspected; repair eligibility depends on puncture location, size, and tire condition. |
| Tread separation or lifting | Look for raised tread sections, irregular gaps, or a section that appears to be separating from the tire. | Tread surface is firmly attached and has a consistent profile. | A raised area, opening, or separated section is visible. | Stop using the tire and arrange professional inspection or replacement. Avoid high-speed driving on a tire showing possible separation. |
| Bead and rim area | Inspect the area where the tire meets the wheel for visible damage, displacement, or air leakage. | The tire sits evenly against the rim with no visible damage or leakage. | The tire appears displaced, the rim is bent or cracked, or air is escaping near the wheel edge. | Have the wheel and tire checked by a qualified service provider. Do not continue driving if the tire will not hold pressure or the wheel is damaged. |
| Valve stem and cap | Check that the valve stem is intact and the valve cap is present; watch for signs of leakage. | Valve stem is secure, undamaged, and not visibly leaking. | Stem is cracked, bent, loose, or leaking; cap is missing. | Have a damaged or leaking valve serviced. Check tire pressure with a gauge when the tires are cold and use the vehicle placard or manual for the correct pressure. |
Tread depth gives a useful snapshot of how much grip a tire may have left, especially on wet roads. Use a tread-depth gauge in several grooves, checking the inner, middle, and outer sections of each tire. Repeat the checks at different points around the circumference; one reading can miss localized wear. Small differences matter. Built-in wear bars are helpful visual warnings, but they do not show every uneven area. Record the measurements and compare them over time. A simple note in your phone can reveal a gradual change that is easy to overlook during a quick glance.
Wear patterns can point toward maintenance issues, but they are clues, not proof. A more worn center may be associated with excess inflation, while wear on both shoulders can suggest insufficient inflation. One shoulder wearing faster may warrant a check of alignment or suspension components. Cupped or scalloped patches also deserve attention, though several causes are possible. I would avoid diagnosing a problem from appearance alone; tire pressure, load, road conditions, and driving habits all affect wear. Inspect all four tires in good light, and have a qualified technician assess unusual or rapidly changing patterns. A gauge is useful, but interpretation takes care.
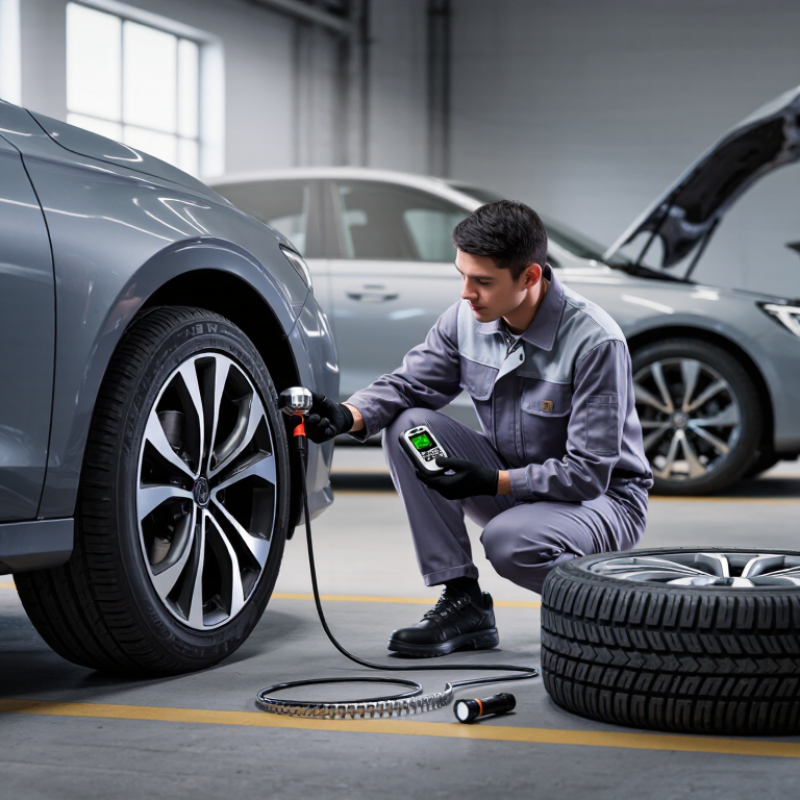
Tire-pressure and inflation-system inspection starts with a reliable gauge, not a glance at the tread. Check pressure when tires are cold, ideally before driving, and compare each reading with the vehicle’s door-jamb placard. The pressure printed on a tire’s sidewall is not the vehicle’s target. Check all four tires and the spare; a low spare can be forgotten until it is needed. A tire can look fine. The U.S. Department of Energy estimates that proper inflation can improve gas mileage by up to 3%, while each 1 psi drop across all tires can reduce fuel economy by about 0.2%.
The inspection should include the tire-pressure monitoring system (TPMS), valve stems, and visible signs of air loss. A steady warning light calls for a manual pressure check; the system does not replace one. Under U.S. FMVSS No. 138, TPMS must warn drivers when pressure in one or more tires falls substantially below the recommended level, generally 25% or more. If pressure keeps dropping, inspect for a puncture or a leaking valve and seek qualified service. A monthly check is useful, but it can miss a slow leak that begins the next day. That is an imperfect routine, so recheck after sharp temperature changes or a tire impact.
In 2026, a professional tire inspection should look beyond tread depth. Uneven wear can point to alignment problems, incorrect pressure, or worn suspension parts. Feathered tread edges may suggest toe misalignment, while wear on one shoulder can indicate camber issues. These patterns are clues, not diagnoses. A trained technician measures tread across several points and checks tire pressure, wheel condition, and visible damage. Small details matter.
A proper alignment inspection uses calibrated equipment to assess toe, camber, and caster against the vehicle’s specifications. The technician should also check steering and suspension components, since loose parts can undermine alignment results. A steering wheel that sits off-center or a vehicle that pulls to one side deserves attention, though road slope and tire condition can affect symptoms. No single reading tells the whole story.
Internal damage may not show on the outer surface. A qualified technician can remove the tire from the wheel and inspect its inner liner, beads, and sidewalls for cuts, separation, or impact damage. A bulge, exposed cords, or pressure loss calls for prompt assessment; do not rely on appearance alone. I would not call a visual check foolproof. Ask what was inspected and which findings support the recommendation.